As businesses increasingly rely on Salesforce to manage customer data. It’s reassuring that it provides two main data export methods: the Data Export Service and Data Loader. These tools are user-friendly and make the process of exporting data a breeze.
Data Export Service

The Data Export Service is an in-browser service accessible through the Setup menu. It offers various options. Users can manually export data once every seven days for weekly or 29 days for monthly exports. Weekly or monthly intervals also support automatic exports. This flexibility ensures that you can export your data to suit your business needs.
To initiate data export using the Data Export Service, users can follow these steps:
- Firstly, from Setup, they should enter Data Export in the Quick Find box, then select Data Export and choose either Export Now or Schedule Export.
- The Export Now option prepares files for immediate Export, provided enough time has passed since the last Export. On the other hand, the Schedule Export option allows users to set up a monthly export schedule.
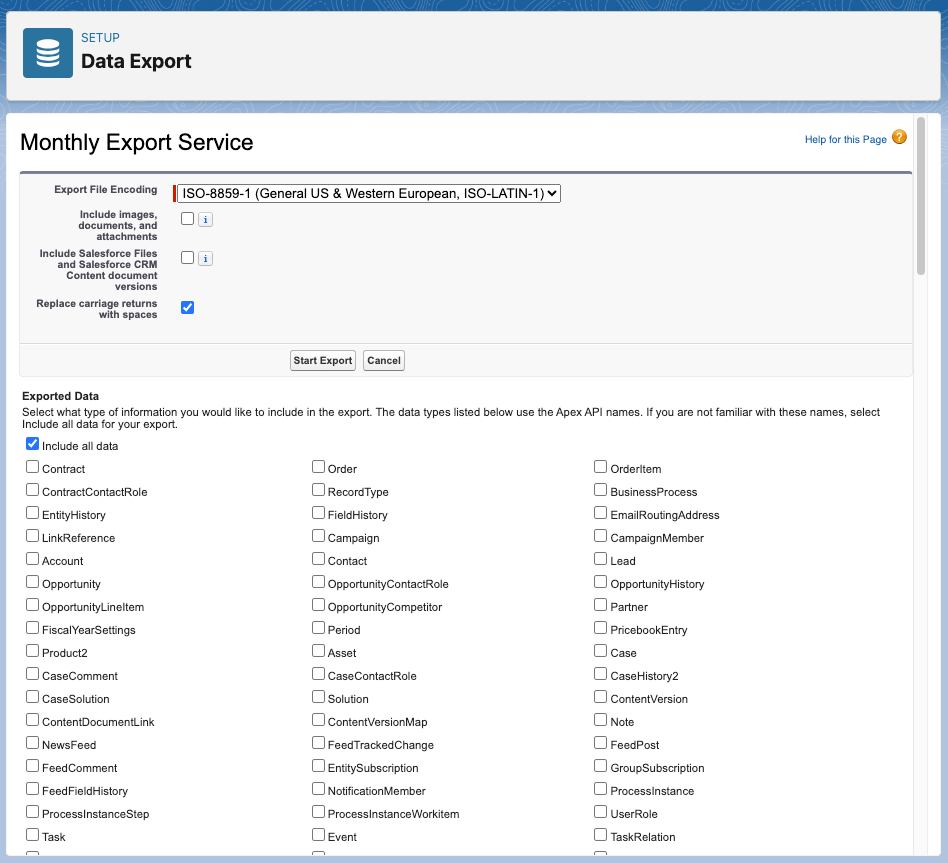
- Users can then select the desired encoding for the export file and specify whether to include images, documents, attachments, and other data.
- If scheduling the Export, users can set the frequency, start and end dates, and time of day for the scheduled Export.
- Under Exported Data, users can select the types of data to include in the Export, with the option to include all data if they are unfamiliar with specific data types.
- Finally, users can click Start Export or Save. Salesforce will create a zip archive of CSV files and email the user when the Export is ready. It’s important to note that the system deletes zip files 48 hours after sending the email.
Data Loader
The Data Loader, a client application that requires separate installation, offers distinct advantages. It provides versatility as users can operate it through the user interface or the command line. Its key benefits include automating the export process and integrating with other systems via APIs, enhancing its value for Salesforce data management.
To initiate data export using Data Loader, users can follow these steps:
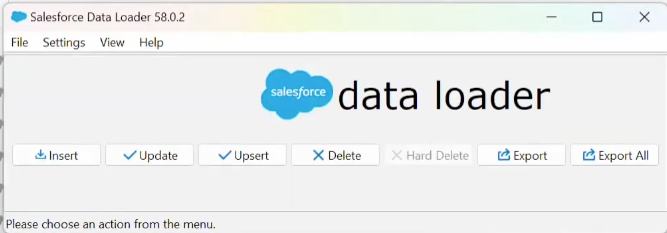
- Firstly, start the Data Loader by double-clicking the Data Loader icon on the Desktop or the Applications folder.
- Click Export. If you need to export active and soft-deleted records, click Export All.
- Enter the Salesforce username and password, and click Log in.
- After logging in, click Next. If the organization restricts IP addresses, it blocks logins from untrusted IPs until they are activated. Salesforce automatically sends an activation email containing a security token, which you must add to the end of your password to log in.
- Choose an object to export and select the CSV file to export the data to.
- Create a SOQL query for the data export, choose the fields to export, and optionally select conditions to filter the dataset.
- Review and edit the generated query if necessary, then confirm the Export.
- A progress information window will report the status of the operation, and after completion, a confirmation window will summarize the results.
Understanding these processes is beneficial and crucial for efficiently managing and utilizing your Salesforce data. By familiarizing yourself with the Salesforce Data Export Service and Data Loader, you’re taking a proactive step toward ensuring the integrity and accessibility of your data.